Sunday, December 21, 2014

The World's Best Peanut Butter Fudge


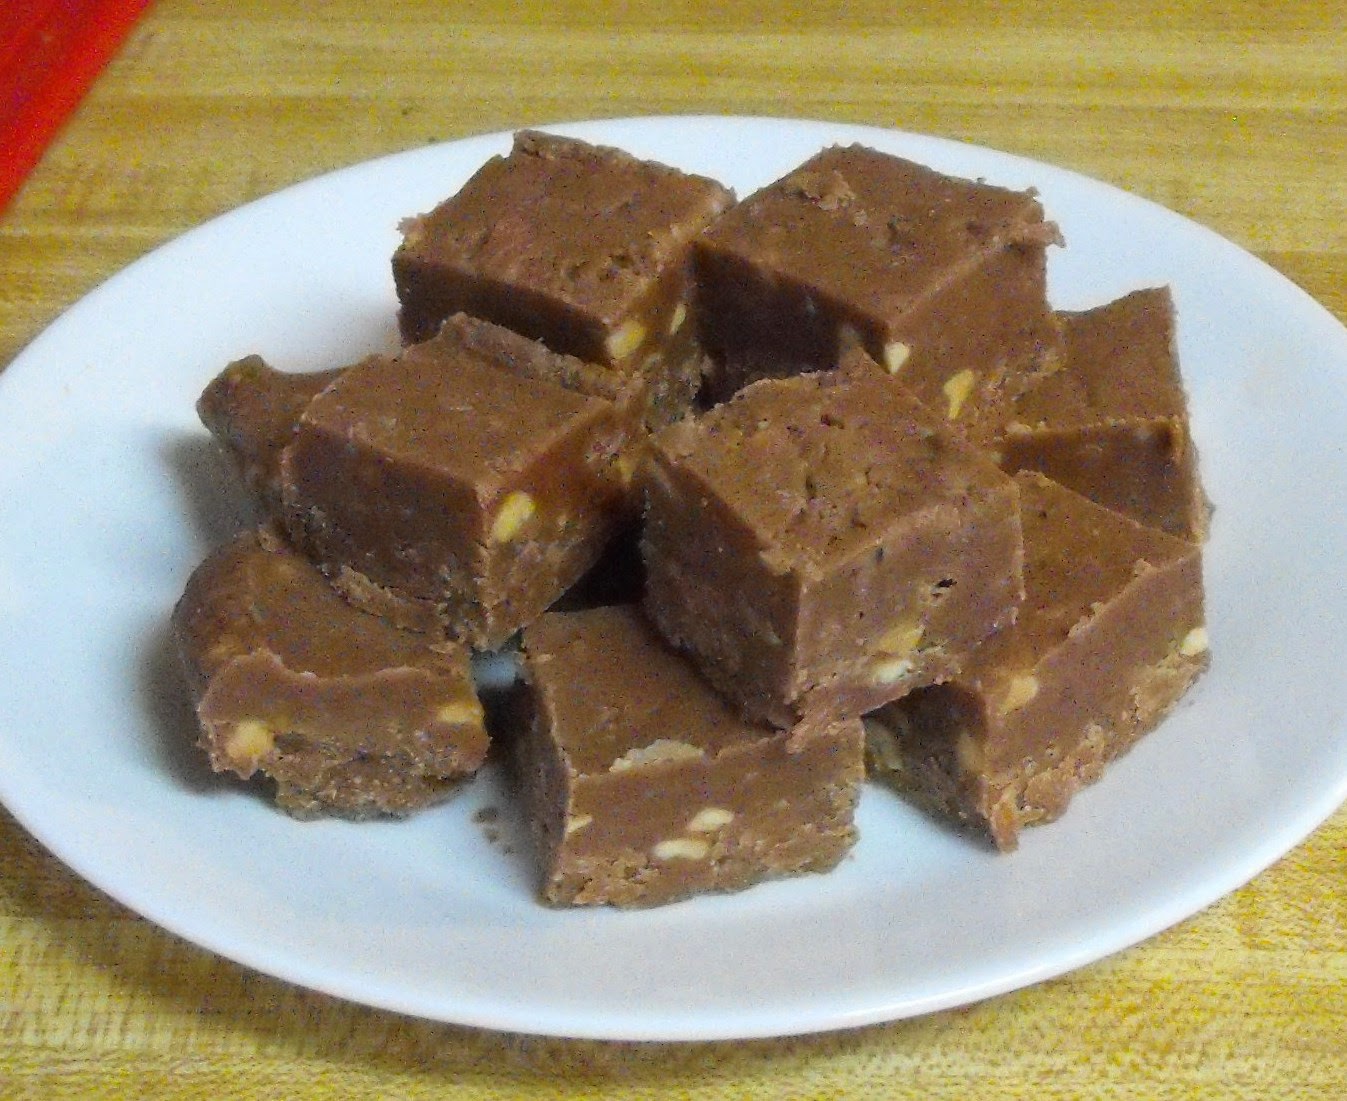
Today I made the world's best peanut butter fudge. 

When I first started writing this post, I hadn't even cut it yet, it was in the fridge, cooling off.  I made that statement based on licking the spoon and scraping the pot clean and licking the spoon again.  

It's that good.  

And now that it's cooled and cut and I've tasted it again, I stand by my initial statement.  '

This is the world's best peanut butter fudge.  


I'm so happy I tried this, and at the same time, a little worried that I might like this just a little too much.  It's made from pantry ingredients that I pretty much keep on hand at all times, and it's really easy, too.

Ingredients:
  • 1 cup (2 sticks) butter
  • 1 1/2 c peanut butter ( I used 3/4 c crunch and 3/4 c smooth)
  • 1 t vanilla
  • 3 T baking cocoa
  • 3 1/2 c confectioners sugar (this is the equivalent of 1 box if you buy it in a box, or usually half a bag if you buy it in a bag)


Melt the butter in large saucepan on medium heat.  I should have used one with higher sides, but I didn't know that yet. Add the peanut butter, and stir as it melts until it's well blended.  Add the vanilla.

Meanwhile, sift the confectioners sugar, and stir the cocoa into the sugar.


Add the confectioners sugar mixture to the liquid and remove from heat....


...and start stirring.  

At one point, you will decide that you have wasted your ingredients and this will never all mix together.

But persevere!


Pour (this is a euphemism--glob the stuff out of the pot) into a foil lined 8x8 pan and allow to cool.


Once it's set, turn onto a cutting board and cut into bite sized squares.

Then eat all of the little crumbly pieces that fall of it or don't look pretty.  Well, probably not all or you might sicken yourself out on this delicious fudge, and trust me, you don't want to do that.  .


Until next time, good cooking, and good eating!

This post is linked to:

See Ya in the Gumbo at Ms. enPlace
Motivation Monday at A Life in Balance
Make Your Home Sing Monday at Moms the Word
Foodie Friday at Rattlebridge Farm
Treasure Box Tuesday at Yesterfood
Homemaking Party at Hope in Every Season
Wake Up Wednesday at SewCraftyAngel

Thursday, November 27, 2014

Easy Pumpkin Muffins


Today I thought I'd share a super easy "recipe"  that"s been passed around among all of the ladies of my family this fall.  I always say that "quick and easy" are my middle names in the kitchen, and the same is true of most of my family, so this has been a big hit with each and every one of us.


Ingredients:

  • Spice cake mix
  • 15 oz can of  pumpkin
  • add-ins, if desired--your choice of raisins, dates, chopped nuts, chocolate chips
One of the things I really like about this is the super simplicity of the ingredients list--cake mix and pumpkin are all that's necessary-no eggs, no oil, no "nuthin", just cake mix and pumpkin.  The add-ins are just lagniappe--that little something extra that just adds to the deliciousness. 


Step 1--open the cake mix and dump it in a bowl.
Step 2--open the pumpkin and dump it in, too.
Step 3--mix it together.  I use a big metal spoon.


At about this point, you will start to doubt the veracity of this--it looks like there will never be enough moisture to make this into anything edible, but if you just keep stirring....


...you will end up with a sticky dough that looks like this!


And now is where the fun begins--you may add some additional spices, if you'd like--depending on the cake mix used, I sometimes add pumpkin pie spice, cinnamon, allspice, or nutmeg, just a teaspoon or two, total, of spices.  The day I made this batch, I totally forget the extra spice.  You might notice the pecan halves--I would advise chopped pecans, but I was feeling exceptionally lazy this day and just left them alone.  I didn't measure, just added a handful.


Same here, no measurement, I just added a handful of chocolate chips, and stirred them in.


Spoon batter into a paper lined muffin tin. The original version of this called for making 18 muffins, but they come out a little small, so I decided to make only 12, and I liked the size of this batch better.

Bake at 350, for 15-25 minutes, according to the size of the muffins you make.

The dough is really sticky, so I didn't try to smooth it out at all....


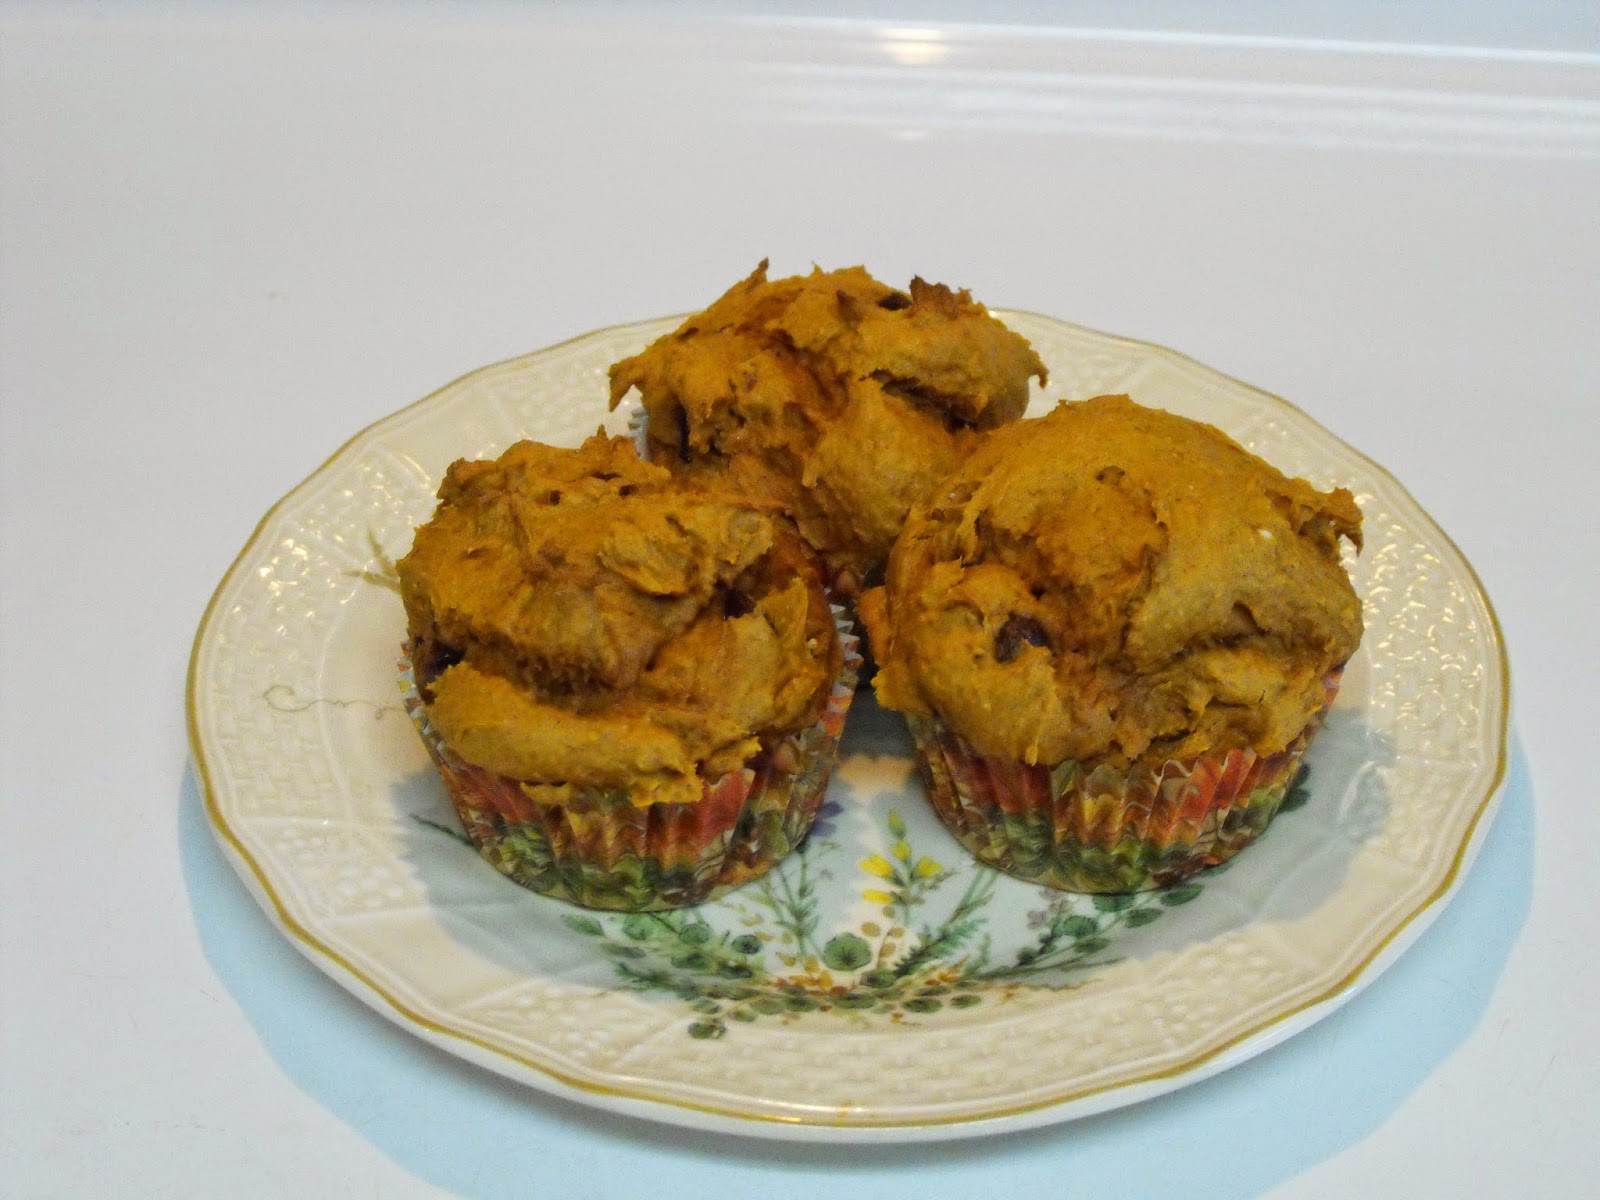
...so the resulting muffins are bit rustic looking--what in the food world I guess we'd call artisan.


Variations:

I've made this recipe 3 times, each time slightly different, but each time delicious.

The first time I used a carrot cake mix instead of spice cake, which had carrot slivers and raisins in it, and I added a few chopped nut, made 18 small muffins, and added a simple powdered sugar and milk glaze to the top.

The second time I used spice cake mix, and added chopped dates and nuts, made it in a 9 x 13 pan, and added a cream cheese and powdered sugar glaze.

And this time, as you can see, I used the spice cake mix with chocolate chips and pecans, and no glaze.

I haven't tried it in a loaf pan yet, but I think that's my next experiment. All you have to vary is the cooking time.  Use your judgment and insert a toothpick to check for doneness.

I also think you could use a plain cake if that's all you have, and just add some extra spices--pumpkin pie spice, allspice, nutmeg, cinnamon--I think it would be great no matter what you add!

Until next time, good cooking, and good eating!

This post linked to:

Weekend Re-Treat
Foodie Friday at Rattlebridge Farm
Show and Tell at My Romantic Home
Weekend Bites at Simple Living and Eating
See Ya in the Gumbo at Ms enPlace
Penny Pinching Party at The Thrifty Home
What's Cooking Wednesday at Buns in My Oven

Tuesday, November 26, 2013

Thanksgiving Classics--Sweet Potato Casserole with Pecan Praline Topping


This is not your typical Thanksgiving-day-yams-with-marshmallow-topping sweet potatoes, this dish has a yummy topping made with brown sugar, pecans, and butter that melts together into a praline flavored crust on top of soft and sweet mashed sweet potato souffle.

Ingredients:
  • 3 c mashed cooked sweet potatoes
  • 1 c sugar
  • 1/2 c melted butter or margarine
  • 2 eggs
  • 1 t vanilla
If you're using canned sweet potatoes/yams, drain and mash. If using fresh sweet potatoes, bake these ahead of time, then scoop out the insides. (I used to make these with drained, canned sweet potatoes, and thought they were great--until I has some leftover baked sweet potatoes and used them instead. Now I use canned only in case of emergency!) Add the sugar and melted butter. Beat eggs separately, and add after the butter has cooled a little. Add vanilla, and beat with mixer until ingredients are well blended. You will probably still have some lumps, unless you run it through a food processor. You can also mix by hand, but the batter will not be as smooth. Pour this into a greased or cooking-sprayed 8 x 8 pan or equivalent casserole dish.


In a separate bowl, mix together :
  • 3/4 c chopped pecans
  • 1/4 c flour
  • 1/2 c brown sugar
  • 2-3 T melted butter or margarine
Mix together the nuts and flour, then add the brown sugar and stir together. Add the melted butter last, and stir until everything is moistened. Sprinkle the topping evenly over the sweet potatoes.

If I use finely chopped pecans, or for special occasions when I want the finished product to look especially pretty, I add extra pecan halves on top. There's something that happens when I add the pecan halves on top that's more than the sum of the separate ingredients--the nuts take on a completely different taste, with a smoky, roasted flavor, which combines with the brown sugar and butter to a make a candied pecan taste that is out of this world.

Bake at 350 for 25-30 minutes, (longer if you make this ahead and refrigerate overnight) or until topping is melted together and browning on the edges.

This makes the best sweet potatoes--the perfect side dish that's also good enough to eat for dessert!

Until next time, good cooking, and good eating!

This post is linked to:

In and Out of the Kitchen at Feeding Big
You're Gonna Love It Tuesday at Kathe with an E
PINcentive Blog Hop at Cropped Stories


Thursday, November 7, 2013

Cauliflower Pizza Crust


We eat lots of vegetables these days around my house--not a statement I thought I've ever be making! 

For years the vegetable selection in my cupboard and freezer was limited to predominately peas, corn and potatoes, with an occasional green bean thrown in for good measure.  I thought I had really branched out when I started feeding my family frozen mixed vegetables!  Here lately, though, I make lots and lots of oven roasted vegetables--crispy baked kale, brussels sprouts, and root vegetables, along with our tried-and-true favorites, and we've all been a lot more willing to at least try vegetables that we used to scorn.  

And that's what has lead me to try something way outside of our little comfort zone--pizza crust made out of---wait for it---cauliflower. My initial response was "eeeewwww", since cauliflower is one of those veggies that I have disliked since childhood.  However.  Since I've had some success with other eeewww-factor vegetables by cooking them in unusual-for-me methods, I decided to give this a try.

Since my husband and I are meat-eaters, and my son is a semi-vegetarian (another reason for me to widen my vegetable repertoire) I decided to make two crusts, one for a meat pizza and one for a vegetarian version. 


Ingredients: (makes two crusts)
  • 2 bags frozen cauliflower
  • 2 eggs
  • 2 cups finely grated mozzarella cheese
  • 1 t dried minced garlic
  • 1 t salt
The first step was to steam the cauliflower.  All of the recipes I'd read on-line mention that the cauliflower needs to be as dry as possible after cooking, so I just covered mine and put it in the microwave from frozen with no extra water and cooked it until it was softish, about 10-12 minutes or so.  


The tips I read said to use a ricer, which I don't have.  I tried a potato masher, but my cauliflower wasn't really soft enough to mash well, so I broke out my mini food processor and more or less grated it.  Then I added eggs, cheese, salt, and garlic, and mixed well.  I ended up using my hands to be sure the egg was well incorporated.


Next step, I divided the "dough" (sort of a almost-but-not-quite-"mush" really) into two portions, and pressed each out--one onto this lovely well-used pizza pan...


...like so


And one onto this never-used pizza stone, both of which were sprayed with cooking spray first.


Voila'!


Note: Next time I will use parchment paper instead of cooking spray, because mine stuck.


I baked these at 400F for about 25 minutes, until they started to get firm and light brown on top.  


On the meat-eaters pizza, I used basic spaghetti sauce from a jar on half, and pesto (also from a jar) on the other half, topped with cooked ground meat and grated cheese blend.

Bake at 400 degrees for about five minutes, or until toppings are hot and cheese is melted.  When I got this out of the oven, I thought it needed more cheese, so I added another handful of mozzarella and stuck it back in the oven for another couple of minutes.


As noted above, the crust stuck pretty badly, so my plated pictures aren't pretty at all, and I totally failed to get a picture of the vegetarian version, topped with pesto, kale, and cheese, but it was a success, as well.

I have to say--this doesn't taste like regular pizza crust, but it's still good in a different kind of way.  I will definitely try this again, with the tweaks in cooking techniques that I've noted. And get this--it's not only healthier for us because of being made from a vegetable, it's low-carb, and fairly low-fat, also! So it's win-win!

NOTES:
Next time I will use parchment paper, and do the pre-bake slower and longer.  The one on the metal pan stuck worse, I think, but the one on the pizza stone was still damp underneath in the middle.

Until next time, good cooking, and good eating!

This post is linked to:

Slightly Indulgent Tuesday at Simply Sugar and Gluten Free
Homemaking Party at Hope in Every Season
Fantastic Thursday at Five Little Chefs
Frugal Thrusday at A Life in Balance
Foodie Friday at Rattlebridge Farm
Friday Favorites at Simply Sweet Home
Foodtastic Friday at Not Your Ordinary Recipes
The Weekend Re-Treat at The Best Blog Recipes
Sweet N Savory Sunday at Cookin' for the Seven Dwarfs
The Creative Home & Garden Hop at Mumtopia
In and Out of the Kitchen at Feeding Big
Motivation Monday at A Life in Balance

Saturday, October 5, 2013

Quick and Easy Fruit Dip


You may have noticed, I've been on a blog hiatus for a while. I really didn't intended for it to last three months, but somehow the time sped by while I was otherwise engaged. Not sure at what, exactly, but it obviously wasn't cooking or blogging!  

We had a long hot summer, par for the course here in the Deep South, and I did as little cooking as possible, just enough to keep us all fed.  Just lately, though, I've been in a bit of an entertaining mode.  We had someone over to dinner not just once, but twice (one was family, so that may not count); I helped just a little in the planning of food for a bridal shower for one of my nieces...


...aren't they a pretty couple? (sorry, just couldn't resist)

and we've been having some friends, old and new, over on Friday nights for a Torah study at our house.  


One of the recipes we pulled out of our family archives for the bridal shower was this super easy, super delicious sweet fruit dip.  Then I made it again yesterday for our study group. It's so much better than the pre-made fruit dips, and makes twice or three times as much for the same price.

Ingredients:
  • 8 oz cream cheese, softened
  • 1 can sweetened condensed milk
  • 1 container whipped topping
Beat cream cheese with an electric mixer until creamy and soft. Add sweetened, condensed milk and mix until well blended.  Fold in whipped topping. (I just used my electric mixer on low speed).  Cover and refrigerate at least an hour.

(I almost made myself sick while I was making this.  First I had to dig our every bit of the sweetened condensed milk, and lick that spatula clean.  Then the beaters and the mixing bowl.  Fruit, who needs fruit?)


I served it with strawberries, apple slices, and grapes.  I had kiwi but I forgot to peel and slice it. I think this would be good with any variety of fruit, and even some cubed pound cake.  Or better yet, serve sliced fruit over the pound cake, and use the dip as a sauce over the top. 

And yes, it is even better with fruit that just licked off the beaters. 


Until next time, good (un)cooking, and good eating!


This post is linked to:

Foodie Friday at Rattlebridge Farm
The Weekend re-Treat at the Best Blog Recipes
Sweet and Savory Saturdays at Dessert Now, Dinner Later
See Ya in the Gumbo at Ms enPlace
Church Supper at Everyday Mom's Meals
In & Out of the Kitchen at Feeding Big

Sunday, June 30, 2013

Coconut Cream Cake


My daddy is coconut lover from way back, so it really wasn't a big surprise when I asked him what kind of dessert he'd like to have for Father's Day, that he requested coconut cake.  I make a really good rich and creamy Italian Cream Cake that has coconut in it, but for this occasion I wanted something a little lighter, not quite as rich---and I remembered this old favorite from long ago, one we haven't made in I-don't-know-when, Coconut Cream Cake. 

And as you can see from the picture above, we broke out the fine china, as well as adding a little vanilla ice cream on the side.  I love formal dining, don't you?


Ingredients:
  • 1 yellow or white cake, prepared
  • 1 container cool whip
  • 1 can cream of coconut (find this in the alcoholic drink mix aisle, next to the margarita mix--this is one of the ingredients in a pina colada)
  • grated or flaked coconut


Step 1: Make a plain white or yellow cake.  I used Duncan Hines Butter Recipe Golden cake mix, but I "doctored it up" and made my Sour Cream Pound Cake From a Mix, but you can make one from scratch or just a regular cake mix cake if you'd like.  (Hint: If you use a cake mix, use a good one) (Second hint: make it in a 9 x 13 pan that you don't mind taking somewhere or serving from, because this cake stays in the pan.  Don't use that favorite old one that has the black stuff all around the edges that can't be scrubbed off no matter how hard you try, even with a brillo pad.)


Step 2: Poke holes all over the cake with a fork 


Step 3: Mix together the cool whip and 3-4 T of the coconut cream.  (Hint: it's easier to do if you put it in a bowl that's big enough to really stir it around instead of trying to do it in the cool whip container)


Step 4:  Pour the remaining cream of coconut all over the cake in the pan, and allow it to soak in.


Step 5: Spread the coconut-flavored cool whip on top of the cake


Step 6: Sprinkle liberally with coconut.  Actually, just kind of gob it on all over the cake.


Step 7: And this is important--cover it refrigerate for several hours, preferably overnight.  The longer this sits, the better it gets.

This cake was big hit with my Dad, as well as the rest of the family.  This recipe is one of those that everybody made "back in the day" and somehow fell by the way side, but when you make it again after a long time, you think "Why did we ever quit making this, this is good!" kind of recipes. 

Note: You could add some crushed pineapple to the cake batter, or maybe even drain some and spread on top after you soak the cake in cream of coconut, and it would be a Pina Colada Cake.  As a matter of fact, I think we made something like that "back in the day" as well.

What old favorites have you baked up for your family lately?

Until next time, good cooking, and good eating....

This post is linked to:
Church Supper at Everyday Mom's Meals
Meatless Monday at My Sweet and Savory
See Ya in the Gumbo at Ms enPlace
Sweet and Savory Saturday at Dessert Now, Dinner Later

Sunday, June 23, 2013

How to Freeze Purple Hull Peas


Field peas of different varieties are a staple of a southern kitchen, and my personal favorite, as well as most of my family, are purple hull peas.  Mississippi pink eye purple hulls, to be exact.  (You can see pictures of some of them growing on my other blog on the on the post I did last week about my parent's garden.)

It's wonderful to eat fresh vegetables in season, especially home-grown, but part of the fun of having a garden is to be able to "put up" some to eat later.  Preserving food is, to me, both an art and a science, and no one wants to waste time or money "putting up" food that doesn't taste good, or heaven forbid, goes bad. Canning, freezing, drying, pickling and preserving, there are a myriad of ways to do it, and some foods just take better (and taste better) if they're done a certain way, and purple hull peas, in my opinion, are one of them, and the way that they taste best is frozen--IF--and that's a big "if"--they're done the right way!

And what is the "right" way of freezing purple hull peas?  I'm about to show you the secret.

And what is the secret? 

Blanching and shocking.

And I'm about to show you how!


This is a dishpan full of peas, peas, glorious peas.  I love running my hands through a pan full of freshly shelled peas. I don't even know how to tell you how they feel, cool and just slightly moist to the touch; I feel like Midas counting my gold when I play with peas. (Yes, my momma told me not to play with my food, but this is fun!).

This dishpan full was from about a bushel and half of unshelled peas, or about 13 1/2 pounds (General speaking, purple hulls weigh out at 9 pounds a bushel, unshelled.)


Although my parents wash the peas in the shell twice before they go through the sheller, the first step is always to wash them twice again. 


My mom has her techniques down to a routine--fill one dishpan with water, then swish around and lift them into a second pan...


...she gets a rhythm going, of swish and plop...


And when she finishes the first washing...


...she adds water and does it all over again...


....to still another dishpan.


Swishing and plopping (they're my own technical terms)...


...until we have another dishpan full of lovely washed peas.  (not fun to handle after they're wet)


Then she drains the water from the dishpans....


...and this is secret number one--try to one of these little strainers, or you will fill you drain up with all of the little goopy things that come off the inside of the shells. 

(And you will need your sink to be fully functional, this is a sink-intensive task)


Secret number two--use a blanching pot, which is large (think soup-size)  pot with an insert like the one above, which makes putting the peas or other vegetables in and out of the boiling water much easier. 
 (You don't have to have one of these, but trust me, it's much easier if you do.)


Secret number three--don't fill the pot full, you need to leave room for the water to boil, with vegetables in it, without overflowing.   


Secret number four--it's much easier if you have two blanching pots, or at least two inserts, so you can speed up the blanching time by having one in the pot, and one ready to go when the first one gets ready.


Secret number five--don't over fill the blanching pot insert (see secret number three)


Secret number five--while you're waiting for the water to boil, pre-mark your freezer bags with the date so that next year you'll know how long things have been in your freezer.  If you freeze mystery food, you may want to include what's being frozen, but peas are pretty much self-evident.  (My parents use a code instead of the date.  They're mysterious like that.)

Secret number six--use a good quality freezer bag, not a storage bag, to put things into the freezer.  Don't waste your time and money, not to mention your good produce, by using cheap bags that aren't made for long-term storage.


And now--step one--once the water comes to a boil, put the peas (or whatever vegetable you're putting up) into the water, and bring back to a boil.  Stir a little to make sure the boiling water is coming into contact with all of the food being blanched. 

Guess what?  You're blanching!


Skim off the foam and stuff that floats to the top.

And now for the tricky part--each different vegetable blanches differently.  Small things, like peas, take less time than something big, like and ear of corn. 

We did these about 3-4 minutes after the water was boiling again.  My mother is magic, she just knows when it's been long enough.
(Actually, she's done this so long, she goes by the look of the peas when they're about done.)


Now you're ready to shock the peas---no, no, you don't have to tell them your deepest, darkest secrets, you just have to cool them off rapidly, to stop the cooking process.  This is done with water and a lot of ice.

And on to secret number seven--it takes a lot of ice.  A lot.  Your ice maker cubed ice is not enough.  Some people buy bags of ice, but don't waste your money--little pieces of ice melt too fast, you need big ice, so make ice ahead of time in recycled plastic bowls.  (Don't use your good tupperware, most of them will spit after they've been frozen a few times--once these split, we send them to plastic heaven and get more out of our saved-all-year-for-this-purpose-stash)


Fill one side of the sink with water, and throw in some cool-whip-bowl ice.


Take the insert and rinse it with cool water from the tap, swishing around to cool off the pot...


(rinsing it first in tap water cools off the pot and keeps it from melting the ice too fast)


Put it over in the ice water side and continue to rinse until the vegetables are cool.


Guess what? 

You're shocking!

(Not, you are shocking (noun) as in you are a shocking person--you are shocking (verb), as in you are blanching and shocking to put vegetables into the freezer!)


Next step--bag them up! 


A hundred years ago when all of us kids were at home, we used to make what we called "fat quarts"--as much as we could fit in the bad and it close properly--now mom and dad make "skinny quarts" so they don't have to eat peas for a week at a time--although peas are even better when they're left over and heated up, but even the best thing gets old after a while.

We make a game of it--when the peas are still in the dishpan, we all take turns guessing how many bags we'll end up with--and this time, we had 11 quarts (some fat, some skinny) which I got to take home to my house and put in my freezer! (One last secret--spread the bags out in your freezer in a single layer, if possible, until they're well frozen, and then stack them, that way you know everything is frozen in a timely manner)

Note: I know of some people who cook their peas completely before freezing or canning, and that works, but you miss that just-cooked-fresh-from-the-garden taste that you get from doing it this way.  I've also heard of people who just shell their peas and freeze them in big bags without the whole blanching and shocking process, but we don't like the way they taste or keep that way.


If you want to see the process I use to cook peas that have been frozen like this, you can my Pass the Peas, Please post.

So now you know the Secrets of this Southern Kitchen when it comes to "putting up" peas--and many thanks to my mom and dad for letting me take picture of the process. (My mother has threatened me if I show her face--one of these days I'm going to sneak one in!) This was just the first picking, and a small one at that--my folks have already put up over 70 quarts of green beans alone, there's no telling how many quarts of peas will come from their garden this year. So needless to say, I trust their experience and their expertise.


Until next time, good cooking, and good eating!

This post is linked to:

See Ya in the Gumbo at Ms enPlace
Meatless Monday at My Sweet and Savory
Make Your Home Sing Monday at Mom's the Word
Metamorphosis Monday at Between Naps on the Porch
Tuesday Garden Party at An Oregon Cottage
Teach Me Tuesday at Growing Home Blog
Works for Me Wednesday at We Are THAT Family
Wow us Wednesday at Family Home and Life
Homemaking Party at Hope in Every Season