Tuesday, December 22, 2009

The Secret to Good Queso (Reprive)

The pictures are new, but the text is a repeat of a post from last December--Please enjoy!


I can remember the first time I tasted queso. It was at a family get-together, and I think my aunt brought it.

It was homemade, and we thought it was So Exotic.

We even called it by an exotic name--"Ro-tel cheese dip".

Back in the "olden days", Ro-tel tomatoes came two ways--with green chilies, or without. The recipe was so simple--one can of Ro-tel tomatoes to one pound of Velveeta. Which meant if you bought the big box of Velveeta, you needed two cans.

These days, you can buy untold varieties of Ro-tel tomatoes. I saw some the other day that were flavored with lime juice and cilantro. (Something about that sounds sooo good.)

They also come already diced, which is where the problem lies. Most people, these days, when they make ro-tel dip, just chunk up the Velveeta and pour the diced Ro-tel tomatoes over the top, then melt it all together in the microwave. Now, I have to say, it's not bad that way. But if you use the old recipe of two cans of diced Ro-tel to two pounds (the big box) of Velveeta, it's not the right consistency, and to me, it doesn't taste as good as the way we did it back in the "olden days".

And how did we do it "back in the day" before Ro-tel came already diced? We opened up the two cans of Ro-tel, dumped it into a blender or food processor, and more or less liquefied it. Then chunked up the Velveeta, poured the liquefied Ro-tel over the top, and melted it in a double boiler, or very carefully in a regular saucepan, on top of the stove.


Stay with me, now! I'm not advocating ditching the microwave!! Melted is melted, I don't care which way you do it! BUT--and this is the BIG SECRET--whether you buy the old fashioned, whole Ro-tel tomatoes, or whether you buy the diced ones---throw them in the blender and liquefy them all first.

You may not think it would make that much difference, but it does, TRUST me. The flavors of the tomatoes and the spices blend with the cheese so much better.


Microwave on about 80%, and stop and stir every few minutes or so.


Once it the Velveeta gets melted and you can really stir and blend it together, it looks disgusting, but persevere!


Continue to stir, and all of a sudden, it will go from weird looking mixture to
the Best Cheese Dip Ever.
Now you know I can't do a recipe without giving you some variations. Add one of the following stir-ins for something different:
  • cook and drain 1/2 lb to a pound of ground meat or pan sausage and stir into dip
    add a small container of chopped or sliced black olives
  • for a creamier dip, use one can of Ro-tel, one pound of Velveeta, and after melting, add an 8 oz container of sour cream and a packet of ranch dressing mix.
  • add a large can of chili when you add the tomatoes; heat and stir all together

But my very favorite way to eat this dip is just plain, made from two cans of liquefied Ro-tel and the big box of Velveeta.

Pass the Ruffles, please.

Good cooking, and good eating!

Thursday, December 17, 2009

Gifts From the Kitchen--Microwave Fudge, Part Deaux

Earlier this week I shared a recipe for easy microwave fudge that turned out dark and rich and pretty good, but it wasn't the real old-fashioned fudge taste I've been craving. I'm not even talking about the lighter, creamier marshmallow fluff fudge that a lot of folks make--those are all good, but I've been wanting some good old fashioned cooked sugar fudge--the kind you make from basic kitchen ingredients, not these "new fangled" so-called fudges made with manufactured chocolate chips and marshmallows(!) I finally found a recipe I thought might be it, but it called for quite a bit of cooking in a heavy saucepan, and I wasn't sure the furnished pots here in our apartment would quite cut it, so I was waiting until I go home at the end of the week to my own kitchen to try to recreate the taste I was searching for.

Then I stumbled on this recipe, and I vaguely remembered making something similar when I first got a microwave 25 years ago. Yep, 25 years and counting, and believe it or not it still works. I've been wanting smaller, sleeker version for years, but the cheapskate in me won't get rid of perfectly good appliance. It's quit working three times, and every time my husband has been able to fix it. Sigh. But I digress...

This recipe is simple, easy, and uses common ingredients found in almost any pantry.


Ingredients:
  • 1 box confectioners sugar (approximately 3 1/2 cups)
  • 1/2 c unsweetened cocoa
  • 1/4 t salt
  • 1/4 c milk
  • 1/2 c (1 stick) butter
Put everything in a microwave safe bowl. Don't stir or mix or do anything to it.

Microwave for two minutes, then get it out and start stirring. You'll think it isn't going to work, but just keep stirring. At one point, everything was blended except for a few stubborn lumps of sugar, so I stuck it back in for another minute, then stirred again. A lot. At this point you can add nuts if you'd like. I decided to leave this batch plain.

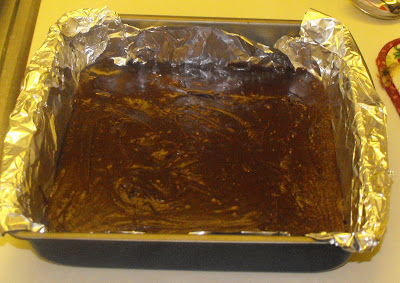
Pour into a prepared (greased) pan--or better yet, line with foil and spray with cooking spray. Let cool--I stuck mine in the fridge and just left it for a couple of hours.


Turn out onto a cutting board, peel back the foil, and cut.

This is the best fudge I've made so far this year. It's wonderful. It's not smooth and creamy, it's firmer, sort of dry-ish and crumbly. It tastes like old fashioned sugar fudge.

I can't wait to do it again.

No pretty packaging for this, I packed it up in ziplock bowls to take back to Louisiana with us!

Tomorrow is a travel day, and I'll be settling in at home and getting ready for the week to come, but come back next week for more last goodies from the kitchen.

This post is linked to:
Foodie Friday at Designs by Gollum

Until next time, good cooking, and good eating!

Wednesday, December 16, 2009

Gifts From the Kitchen--Candy Cane Reindeer


This is not strictly from the kitchen, but it's kind-of-sort-of food related!

I used to make these every year when my son was in elementary school for his class, but I've also made them to hand out at church and at work for "grown-ups", too. Over the years I've hung a few on the tree, and tied them to packages, too. They're so cute, they seem to bring a smile where every they are!

If you need a little something extra to add to your food gifts this year, check out my post on A Virtuous Woman about to how to make these Candy Cane Reindeer.

Until next time, good (un) cooking, and good eating...

Gifts From the Kitchen--Easy Microwave Fudge

Number three in my installment of gifts from the kitchen is a variation of an old stand-by--rich chocolate-y fudge.

This particular recipe is by far one of the easiest recipes for quick fudge that I've ever run across.

The basic fudge has only three ingredients, but it lends itself to any number of variations.


Ingredients:
  • 1 12 oz pkg chocolate chips
  • 1 can sweetened , condensed milk
  • 1 t vanilla
Grease a 9 x 9 pan--I lined my with foil and sprayed with cooking spray--you could probably use parchment paper, as well.

Combine chocolate chips and sweetened condensed milk in a microwave safe bowl.


Microwave 2-3 minutes, stirring after every minute, or until chocolate is melted and the milk is incorporated (this picture is after 1 minute) I stirred again at 2 minutes and cooked it an additional 30 seconds just for good measure. Add vanilla and stir well. At this point, I decided on an add-in and stirred in about 1/3 cup of chopped pecans. (Next time I'd probably go with 1/2 cup).


Pour into your prepared pan and chill for about two hours.


Turn out onto a cutting board, peel back the foil if you used it, and it's ready to cut.
This made a thin, dark, rich tasting fudge. I used semi-sweet chocolate chips, but I think it would be good with milk-chocolate chips, and probably the peanut butter or butterscotch flavored chips as well. I'd love to a layered fudge with this, and may try that later in the week.


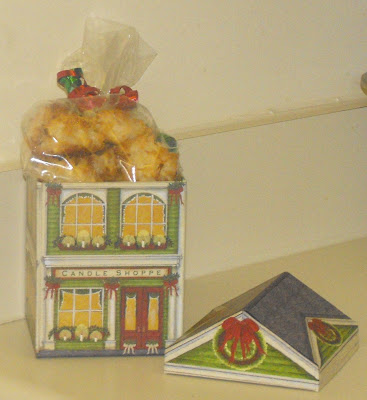
I packed some of it in this cute little mini-lunch box tin that I bought in the seasonal decorations at Dollar Tree.

Besides the ease of this recipe, I liked the fact that the ingredients are items you can keep on hand for anytime, not just during the holidays. Chocolate chips and sweetened condensed milk may not be something you keep on hand in a really basic pantry, but I think most of us have them on hand or readily available during the holidays, at least.

Why not stock up while they're on sale everywhere and surprise your family with this luscious bite of rich chocolate later in the winter, when they aren't expecting it? Maybe you can make your own goodies for Valentine's Day, too, instead of buying "store-bought" candy.

Don't forget to come back every day this week for more quick and easy recipes that can be used for your family or for gifts, along with ideas for packaging your goodies for giving.

Until next time, good cooking, and good eating!

Tuesday, December 15, 2009

Gifts from the Kitchen--Quick and Easy Coconut Macaroons

For my second installment in the Gifts from the Kitchen series, I chose a cookie that's unusual for me, especially in a homemade version.
Ya'll know that "quick and easy" is my middle name when it comes to recipes--this recipe is no exception, but I am so impressed with myself for making these--almost as much as when I made my first pie crust from scratch. I had no idea that coconut macaroons were so easy to make, and oh, my, are they wonderful. These are not those horrible hard ridged squares that passed for coconut macaroons in my childhood. Chewy in the middle, crunchy around the edges, they're like taking a bite of sweet goodness that I can't even describe.


The only thing about this recipe that I'll definitely do different is the baking sheets--the recipe stated greased, floured baking sheets. The only time I've ever read to grease and flour a pan is for some cakes, but I decided to oblige and do that here. Big mistake, but I learned my lesson, as you'll see.


Ingredients:
  • 1 14 oz pkg sweetened flake coconut
  • 2/3 c sugar
  • 6 T flour
  • 1/4 t salt
  • 4 egg whites
  • 1 t almond extract (I used vanilla)

The recipe I used stated to mix everything together in a bowl--I dumped in the coconut and just added everything else on top, then mixed it up with a big spoon--I was afraid at first that I wouldn't get the ingredients evenly distributed through the mixture, but I just kept on stirring till it all came together. The next time I make these (and there will definitely be a nest time) I'll mix the last five ingredients first, then add in the coconut.

Placing heaping spoonfuls on your prepared cookie sheets. The hardest part was trying the mounds all close to the same size.

Bake at 325 degrees for 17-20 minutes.

This is not really a batter, it has the texture of a wet pile of coconut--but it smells wonderful. And tastes pretty good, even uncooked. Warning--it's extremely sticky, even after you lick your fingers. Don't ask me how I know this.


At this point, they smell so very heavenly. Remove from the baking sheet to a rack to cool.

Can you see how the flour on the baking sheet starts to brown? When you take the cookies off, the spatula leaves big strokes of messed up flour. So you have to wash the cookie sheet before you can re-use it, but instead of greasing and flouring it again...


...come to your senses and use parchment paper instead.


This recipe makes about 4 dozen cookies.


I can't wait to get home next week and make another batch for my family--my Dad, especially, loves coconut. I can see making these anytime, but wouldn't they be pretty in the springtime with just a drop or two of pastel coloring added?


I think they make a good addition to any goodie bags or boxes you're making up this holiday season. They're just enough different from the usual cookies and candy that we all make to be a welcome change.

This post is linked to:

Cookie Exchange
at Hoosier Homemade
Tasty Tuesday at Balancing Beauty and Bedlam
Tuesday at the Table at All the Small Stuff
Holiday Treats Week at the Newlyweds
Christmas Post Link Up at Southern Domestic Goddess
Foodie Friday at Designs by Gollum

Be sure to come back every day this week for more goodies from the kitchen, suitable for eating--and giving!

Until next time, good cooking, and good eating!

Monday, December 14, 2009

Gifts from the Kitchen--3 Jar Mixes


Today I'm kicking off a week-long series on gifts from the kitchen, starting with these pretty layered mixes in a jar.

Right now everyone is getting inundated with goodies at every party and get-together--these ready-made mixes make a pretty gift, and will be appreciated one cold winter night when those New Years diet resolutions have worn off and the ready-made goodies they got at Christmas or Hanukkah are a dim memory.

All you need are the recipe ingredients and some quart jars with lids--wide mouth work better, but as you'll see, the smaller mouthed ones can work, as well. I got two of my recipes from Heart 4 Home's Gifts in a Jar, and used my own brownie recipe for the other. You can do this with just about any recipe, as long as the total volume doesn't exceed the size of your jar--in this case, a quart.


I gathered everything together this weekend for some major baking and "mixing" I had planned, and spread it all out with arm's length. Luckily I had a canning funnel to help fill the jars, but if you don't have one of these handy, you might want to make a loose funnel out of waxed paper for easy of filling with less spilling.


I started off planning to take pictures at each stage, but soon learned and handling "powdery" ingredients like flour and cocoa, and taking pictures don't really mix, so this is the only "during" picture that I ended up with.

The main thing to remember is that the ingredients need to be added with the finer textured ingredients at the bottom, the chunkier stuff at the top--if you start with chocolate chips and then pour flour over the top, for instance, the flour will sift down in between the chunks and mess your layers up.

Step number two is to try to smooth each layer and pack it as tightly as you can. I used a spice bottle for that--guess what, you can't tamp down flour or cocoa very well, the bottle sinks(!) Recipes with oatmeal pack well--add the flour, then the oatmeal, then tamp it down to your heart's content!

Next add the sugars, and last the chunky stuff.


Don't these look pretty? These are for Homemade Brownies, Cranberry Hootycreeks, and Cowboy Cookies.

I added circles of Christmas fabric cut with pinking shears, tied with ribbon and garnished with a berry spray. My last step will be printing out the recipe directions (add butter, eggs, bake at 350, etc ) on some card stock, cutting with the pinking shears, and tying to the jars with the ribbon.

Change the fabric, or leave it off and tie the recipe card on with some raffia or other decorative ribbon, pair a couple of them with a kitchen gadget or two and a pretty dishtowel, and you have a perfect gift for a kitchen shower or housewarming party.


Cranberry Hootycreeks
  • 1 c plus 2 T self-rising flour
  • 1/2 c oatmeal
  • 1/3 c packed brown sugar
  • 1/3 c sugar
  • 1/2 c dried cranberries
  • 1/2 c white chocolate chips
  • 1/2 c chopped pecans

Layer in the order listed. Recipe instructions:

  • In a medium mixing bowl beat together 1/2 c softened butter, 1 egg and t teaspoon of vanilla. Add the entire contents of the jar, and mix together until well blended. Drop by heaping spoonfuls onto greased or parchment paper lined baking sheets.
  • Bake for 8 to 10 minutes at 350 degrees or until the edges start to brown
  • Cool on baking sheet or wire rack
  • Makes 18 cookies

Easy Homemade Brownies

  • 1 c flour
  • 1/2 c cocoa
  • 2 c sugar

Layer ingredients in the order listed ( I messed this up by putting the sugar first--when I tried to tamp the cocoa, it started mixing with the sugar. Oops

Recipe:

  • Pour entire contents of jar into a mixing bowl
  • Add 1 stick (1/2 c) of butter or margarine, melted; stir slightly; then add 4 eggs and 1 t vanilla
  • Pour into greased or cooking sprayed 9 x 13 pan.
  • Bake at 350 for 25-30 minutes

Cowboy Cookies

  • 1 1/3 c self-rising flour
  • 1 1/3 c oatmeal
  • 1/2 c firmly packed brown sugar
  • 1/2 c sugar
  • 1/2 c chopped nuts
  • 1 c chocolate chips

Layer ingredients in order listed--tamp well after the oatmeal lay, and after the brown sugar layer. I made this one first, and did not "pack" everything tight enough, so the first one only held about 1/2 c of chocolate chips. I made another and figured out the best layers to tamp down and everything fit much better.

Recipe:

  • Empty entire contents of jar into a large mixing bowl, and thoroughly blend everything with your hands or a mixing spoon. Add 1 stick (1/2 c) of butter or margarine, melted; 1 slightly beaten egg, and 1 t vanilla. Mix until completely blended. This may require your hands! Shape into balls the size of walnuts, and place on greased or parchment lined cooking sheets.
  • Bake at 350 degrees for 11-13 minutes or until edges are lightly browned.
  • Cool 5 minutes on baking sheet, then remove cookies to racks to finish cooling.
  • Makes about 30 cookies

I had a lot of fun making these--now that I've gotten the hang of it, I may be doing more of these. Be sure to check out the jar mix "recipes" at Heart 4 Home, or do an internet search for "jar mixes", there are tons of different recipes and sites out there with lots of ideas, from sweet to savory.

What pre-made mixes or jar mixes have you made, or would you like to receive?

This post is linked to:

Holly Jolly Christmas Bash, Homemade Gifts edition, hosted by Tatertots and Jello

Cookie Exchange at Hoosier Homemade

Tempt My Tummy Tuesday at Blessed with Grace

Three or More at the Gypsy's Corner

DIY Day at a Soft Place to Land

Tuesday at the Table at All the Small Stuff

Tasty Tuesday at Balancing Beauty and Bedlam

Until next time, good (non)cooking and good eating (or mixing)

Sunday, December 13, 2009

Bryan Foods Giveaway Winners


Thanks first of all to everyone who participated in the giveaway--I had 173 entries in all, that's awesome for a first giveaway, especially on a small blog like mine. I can't wait to visit with everyone who left a blog address and twitter handle. I appreciate everyone who played along!

Much appreciation also to Bryan Foods for furnishing the two prize packages, and to Nicole with MWW Group for contacting me and putting this whole thing in motion.

And without further ado, the 2 winners, chosen by Random.org are:

Random Integer Generator
Here are your random numbers:

66 33

Timestamp: 2009-12-13 23:26:35 UTC

#66 is Robin

#33 is Sheila

I'll be notifying both winners by email.

Be sure to come back this week, I'll be sharing some holiday gifts from the kitchen, as well as several quick and easy recipes for fudge and holiday cookies and candies.

Until next time, good cooking, and good eating!

Monday, December 7, 2009

Bryan Foods Review, and a Giveaway!

Giveaway Closed--stay tuned for the winners!

I was contacted recently and asked if I'd like to sample some of the products available from Bryan Foods, and offer a giveaway for my readers. (That's YOU!) They make a variety of meat products, from smoked sausage and breakfast sausage to cocktail wieners, hot dogs, corn dogs, hams, and lunch meats. You can see more about their products at their website, Bryanfoods.com. I love their slogan, "Bryan Foods, the Flavor of the South"!

Being a southern gal, myself, I'm already familiar with some of their products, and I know they're good, so I jumped at the chance.

I received a package with an insulated bag and ice packs with two from their line-up, smoked sausage and beef cocktail wieners, along with this cute apron.


Here's a better shot of the apron, it's an over-the-head apron with big pockets along the bottom (you can click the picture to see it up close, then hit your back arrow to return to the post) and the neck area is adjustable, too. Ladies, this would be a good apron for us, or even a good bbq apron for our honeys.

Being the frugal gal that I am, I wanted to try everything in as many different ways as I could. I ended up making three different cocktail sausage recipes, and two with the smoked sausage.


Recipe posts follow for:

Meanwhile, Bryan Foods is going to furnish prize packages for TWO of my lucky readers identical to the one I received!

All you have to do to enter is leave your name and email address in my giveaway form--the information will go straight into a spreadsheet that's for my eyes only, and will not be used for any purpose other than this giveaway. The winners will be chosen at random, and notified by email. Once you receive your notification, you'll need to reply with your name and address, which will be passed to a Bryan Foods representative for the sole purpose of shipping you your prize package.

Would you like to have more than one chance to win?
  1. For entry number one, just leave your name, email address, and a comment telling me which recipe you'd like to try, or what you think you might like to make with your prize package goodies.
  2. For an additional entry, follow, or subscribe either by email or in a reader; then leave an additional entry telling me so in the comment section. If you already follow or subscribe, just tell me that in the 2nd entry comment.
  3. Tweet about or mention this giveaway on your blog for a third entry--just be sure to leave a comment (on the form) telling me so.

This giveaway will be open until 6:00 pm Friday, December 11th. I've decided to extend this until Sunday night, December 13th, at 6:00 pm. Looking around the "blogosphere", most giveaways seem to run Mon-Sun, so I'm going to go with the flow on that.

Are you ready?

Giveaway Closed


Good luck!

Smokies in a Biscuit


The very first thing I wanted to make with the Bryan cocktail smokies are a variation on the traditional pigs-in-a-blanket. These would be good for a breakfast or brunch--as a matter of fact, I got the idea from a co-worker who used to bring these to our monthly birthday breakfast at a former workplace.


Ingredients:
  • Bryan Beef cocktail smokies
  • refrigerator or "tube" biscuits


    Lightly grease (or cooking spray) your baking dish (I had a few "overflows" that I put in a different dish that I forgot to spray--not good!)

Flatten your biscuits slightly with your hand. Place one cocktail sausage on the biscuit, and roll the biscuit around it, pinching the edges shut.


Place seam side down in your baking dish.


The biscuit directions stated to bake at 400 degrees for 8-10 minutes. That worked fine for my "overflow" pan that had only a few biscuits that weren't touching, but with this pan, it would have worked better at 350 for more like 12 minutes.
These were really good--again, not your typical pigs-in-a-blanket, but definitely good for breakfast. The biscuit part was just a tad dry--the only other thing I would have done differently is to brush the tops lightly with a little melted butter, and they would have been perfect!

Bryan Foods furnished the cocktail smokies for this recipe--I've received no other compensation for doing this review. The views stated here are those of my own.

Don't forget to enter the giveaway at the top of the page!

Pigs in a Blanket

The second thing I made with the Bryan cocktail smokies was the traditional pigs-in-a-blanket made with two ingredients:
  • Bryan cocktail smokies
  • Crescent rolls
I started off cutting the crescent roll dough into thirds, then later I cut them more into fourths--sort of sideways instead of longways--the shape really doesn't matter, I mean, sausage and crescent rolls, what's not to like?


Roll up your cocktail smokies, and bake at 375 degrees for about 8-10 minutes or until they start to brown.

As always, these were delicious, and super easy to make--and eat, of course! And they're so cute, too!

Bryan Foods furnished the cocktail smokies for this recipe--I've received no other compensation for doing this review. The views stated here are those of my own.


Don't forget to enter the giveaway at the top of the page!