Showing posts with label gifts from the kitchen. Show all posts

Wednesday, December 19, 2012

Last Minute--Gifts From the Kitchen

It wouldn't be December without me doing a quick recap of some of my favorite goodies to "gift" for the holidays. 

There are lots of delicious goodies out there, but not all of them are suitable for "gifting".  You need to have something that's not too gooey or sticky, is easily packaged, and has a decent "shelf-life" without refrigeration or specialty care.  The items I'm linking to below fit all of these criteria, with the added benefit of being quick and easy (my middle name in the kitchen) to make and take. 


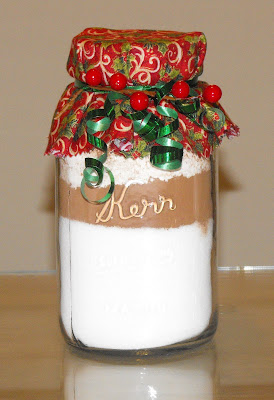
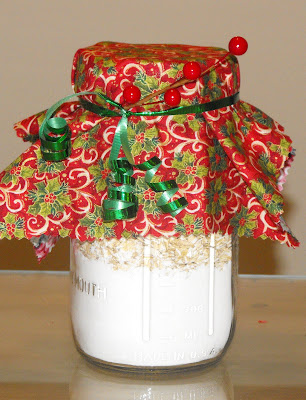
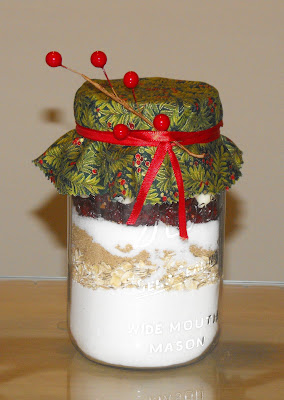
First up are these cute jar mixes.  These are easy to make, easy to take, and easy to dress up with a little Christmas fabric or even wrapping paper, and ribbon.  You can give these individually, or add them to a cute gift basket of kitchen-y items, from dishtowels to gadgets.   


Next up on my list are one of my favorites--coconut macaroons. These are easy to make, smell divine both raw and while baking, and fit that "gift-y" criteria of being easy to package and to keep.  You can leave these plain, or dress them up by adding mini-chocolate chips, or dunk them in what I call "dipping chocolate" and rolling in holiday sprinkles. 


A quintessential goodie for Christmas is luscious, creamy fudge, and this microwave version is super easy to make. The main ingredient is this one is semi-sweet chocolate chips, but you could make variations by changing the flavor of chips--try milk chocolate, white chocolate, or even peanut butter chips for a variety of tastes. 


And last but certainly not least in this installment of gifts from the kitchen, is my absolute very favorite fudge--made in the microwave, it's less creamy, with a firmer, slightly grainy texture that reminds me of the old-fashioned stove-top cooked fudge of my childhood.  You know the kind--sometimes it seemed like it was never going to set up.  As a matter of fact, I remember my sister getting tired of stirring and pouring some into a buttered pan, and I remember my mom and I finally scraping it back into the pot and cooking it a little more when it never got beyond the "chocolate soup" stage.  This one is fairly fool-proof, I think, at least I've never had it not set up for me!

What goodies are you making and taking this holiday season? 

This post is linked to:

Works for Me Wednesday at We are THAT Family
Delicious Dishes at It's a Blog Party
Tempt My Tummy Tuesday at Blessed with Grace

Until next time, good cooking, good eating--and good gifting!

Sunday, December 18, 2011

Gifts From the Kitchen--Microwave Fudge, Part 2

Yesterday I shared a recipe for easy microwave fudge; dark and rich, it's made from easily available items that most of us stock in our holiday pantry.

Today's recipe is just as quick and easy, made from even more basic and readily available ingredients, but it's a whole different taste and texture--more like the old fashioned cooked sugar fudge of my childhood--and has to be my absolute favorite holiday indulgence.


Ingredients:
  • 1 box confectioners sugar (approximately 3 1/2 cups)
  • 1/2 c unsweetened cocoa
  • 1/4 t salt
  • 1/4 c milk
  • 1/2 c (1 stick) butter
Put everything in a microwave safe bowl. Don't stir or mix or do anything to it. (Hint: you might want to sift the powdered sugar, just to get the lumps out and make it easier to mix)


Microwave for two minutes, then get it out and start stirring. You'll think it isn't going to work, but just keep stirring. At one point, everything was blended except for a few stubborn lumps of sugar, so I stuck it back in for another minute, then stirred again. A lot. At this point you can add nuts if you'd like. I decided to leave this batch plain.

Pour into a prepared (greased) pan--or better yet, line with foil and spray with cooking spray. Let cool--I stuck mine in the fridge and just left it for a couple of hours.


Turn out onto a cutting board, peel back the foil, and cut.

This is the best fudge I've made I've ever made. It's not smooth and creamy, it's firmer, sort of dry-ish and crumbly, just like the old fashioned sugar fudge of my cravings.

Until next time, good cooking, and good eating!


Saturday, December 17, 2011

Gifts From the Kitchen--Easy Microwave Fudge, Part 1

Number three in my installment of gifts from the kitchen is a variation of an old stand-by--rich chocolate-y fudge.

This particular recipe is by far one of the easiest recipes for quick fudge that I've ever run across. The basic fudge has only three ingredients, but it lends itself to any number of variations.


Ingredients:
  • 1 12 oz pkg chocolate chips
  • 1 can sweetened , condensed milk
  • 1 t vanilla
Grease a 9 x 9 pan--I lined my with foil and sprayed with cooking spray--you could probably use parchment paper, as well.

Combine chocolate chips and sweetened condensed milk in a microwave safe bowl.

Microwave 2-3 minutes, stirring after every minute, or until chocolate is melted and the milk is incorporated (this picture is after 1 minute) I stirred again at 2 minutes and cooked it an additional 30 seconds just for good measure. Add vanilla and stir well. At this point, I decided on an add-in and stirred in about 1/3 cup of chopped pecans. (Next time I'd probably go with 1/2 cup).


Pour into your prepared pan and chill for about two hours.


Turn out onto a cutting board, peel back the foil if you used it, and it's ready to cut.

This made a thin, dark, rich tasting fudge. I used semi-sweet chocolate chips, but I think it would be good with milk-chocolate chips, as well as peanut butter or butterscotch flavored chips as well--which has me thinking about a layered version--peanut butter and chocolate or any number of other combinations.


I packed some of it in this cute little mini-lunch box tin that I bought in the seasonal decorations at Dollar Tree.

Besides the ease of this recipe, I liked the fact that the ingredients are items you can keep on hand for anytime, not just during the holidays. Chocolate chips and sweetened condensed milk may not be something you keep on hand in a really basic pantry, but I think most of us have them on hand or readily available, at least.

Why not stock up while they're on sale everywhere and surprise your family with this luscious bite of rich chocolate later in the winter, when they aren't expecting it? Maybe you can make your own goodies for Valentine's Day, too, instead of buying "store-bought" candy.

Tomorrow I'll have another easy microwave fudge, but one that makes one that's totally different in taste and texture.

Until next time, good cooking, and good eating!

This post is linked to:

Tuesdays at the Table at All the Small Stuff

Wednesday, December 7, 2011

Gifts From the Kitchen--Jar Mixes

A couple of years ago, I made several different homemade "jar mixes" to give as Christmas and "just because" gifts. I had forgotten how much fun I had making these until I was rimiscing over some old holiday posts. So as the first in my series on gifts from the kitchen (some oldies-but-goodies as well as a few new ones), I'm starting with this post on jar mixes.

These examples are made with common ingredients and go together with a minimum of fuss and muss, but they can be a simple or as complicated as you'd like to make them, and can be put together at the last minute or well-thought out in advance.


One of the reasons I loved these jar mixes is because right now everyone is getting inundated with goodies at every party and get-together--but these ready-made mixes make a pretty gift, and can be put away and brought back out to be appreciated one cold winter night when those New Years diet resolutions have worn off and the ready-made goodies everyone got at Christmas or Hanukkah are a dim memory.


All you need are the recipe ingredients and some quart jars with lids--wide mouth work better, but as you'll see, the smaller mouthed ones can work, as well. I got two of my recipes from Heart 4 Home's Gifts in a Jar, and used my own brownie recipe for the other. You can do this with just about any recipe, as long as the total volume doesn't exceed the size of your jar--in this case, a quart.


I gathered everything together this weekend for some major baking and "mixing" I had planned, and spread it all out with arm's length. Luckily I had a canning funnel to help fill the jars, but if you don't have one of these handy, you might want to make a loose funnel out of waxed paper for easy of filling with less spilling.
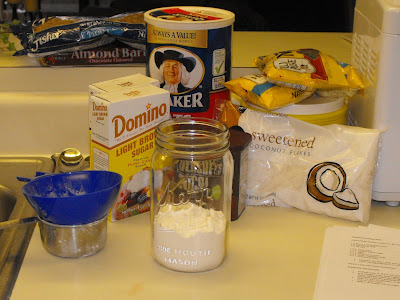


I started off planning to take pictures at each stage, but soon learned that handling "powdery" ingredients like flour and cocoa, and taking pictures don't really mix, so this is the only "during" picture that I ended up with.

The main thing to remember is that the ingredients need to be added with the finer textured ingredients at the bottom, the chunkier stuff at the top--if you start with chocolate chips and then pour flour over the top, for instance, the flour will sift down in between the chunks and mess your layers up.

Step number two is to try to smooth each layer and pack it as tightly as you can. I used a spice bottle for that--guess what, you can't tamp down flour or cocoa very well, the bottle sinks(!) Recipes with oatmeal pack well--add the flour, then the oatmeal, then tamp it down to your heart's content!

Next add the sugars, and last the chunky stuff.


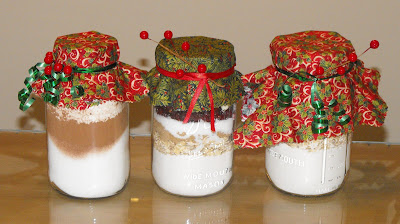
Don't these look pretty? These are for Homemade Brownies, Cranberry Hootycreeks, and Cowboy Cookies.

I added circles of Christmas fabric cut with pinking shears, tied with ribbon and garnished with a berry spray. My last step will be printing out the recipe directions (add butter, eggs, bake at 350, etc ) on some card stock, cutting with the pinking shears, and tying to the jars with the ribbon.

Change the fabric, or leave it off and tie the recipe card on with some raffia or other decorative ribbon, pair a couple of them with a kitchen gadget or two and a pretty dishtowel, and you have a perfect gift for a kitchen shower or housewarming party.

Cranberry Hootycreeks


Ingredients:


  • 1 c plus 2 T self-rising flour


  • 1/2 c oatmeal


  • 1/3 c packed brown sugar


  • 1/3 c sugar


  • 1/2 c dried cranberries


  • 1/2 c white chocolate chips


  • 1/2 c chopped pecans


Layer in the order listed.


Recipe instructions:


  1. In a medium mixing bowl beat together 1/2 c softened butter, 1 egg and t teaspoon of vanilla. Add the entire contents of the jar, and mix together until well blended. Drop by heaping spoonfuls onto greased or parchment paper lined baking sheets.


  2. Bake for 8 to 10 minutes at 350 degrees or until the edges start to brown


  3. Cool on baking sheet or wire rack


  4. Makes 18 cookies


Easy Homemade Brownies

Ingredients:


  • 1 c flour


  • 1/2 c cocoa


  • 2 c sugar


Layer ingredients in the order listed ( I messed this up by putting the sugar first--when I tried to tamp the cocoa, it started mixing with the sugar. Oops0


Recipe Instructions:


  1. Pour entire contents of jar into a mixing bowl


  2. Add 1 stick (1/2 c) of butter or margarine, melted; stir slightly; then add 4 eggs and 1 t vanilla


  3. Pour into greased or cooking sprayed 9 x 13 pan.


  4. Bake at 350 for 25-30 minutes


  5. Makes about 20 brownies


Cowboy Cookies


Ingredients:


  • 1 1/3 c self-rising flour


  • 1 1/3 c oatmeal


  • 1/2 c firmly packed brown sugar


  • 1/2 c sugar


  • 1/2 c chopped nuts


  • 1 c chocolate chips


Layer ingredients in order listed--tamp well after the oatmeal layer, and after the brown sugar layer. I made this one first, and did not "pack" everything tight enough, so the first one only held about 1/2 c of chocolate chips. I made another and figured out the best layers to tamp down and everything fit much better.

Recipe Instructions:


  1. Empty entire contents of jar into a large mixing bowl, and thoroughly blend everything with your hands or a mixing spoon. Add 1 stick (1/2 c) of butter or margarine, melted; 1 slightly beaten egg, and 1 t vanilla. Mix until completely blended. This may require your hands! Shape into balls the size of walnuts, and place on greased or parchment lined cooking sheets.


  2. Bake at 350 degrees for 11-13 minutes or until edges are lightly browned.


  3. Cool 5 minutes on baking sheet, then remove cookies to racks to finish cooling.


  4. Makes about 30 cookies


I had a lot of fun making these--now that I've gotten the hang of it, I may be doing more of these. Be sure to check out the jar mix "recipes" at Heart 4 Home, or do an internet search for "jar mixes", there are tons of different recipes and sites out there with lots of ideas, from sweet to savory.


What pre-made mixes or jar mixes have you made, or would you like to receive?


Until next time, good cooking, and good gifting!


Wednesday, December 22, 2010

Gifts From the Kitchen--Easy Microwave Fudge, Part One

Number three in my installment of gifts from the kitchen is a variation of an old stand-by--rich chocolate-y fudge.

This particular recipe is by far one of the easiest recipes for quick fudge that I've ever run across. The basic fudge has only three ingredients, but it lends itself to any number of variations.


Ingredients:
  • 1 12 oz pkg chocolate chips
  • 1 can sweetened , condensed milk
  • 1 t vanilla
Grease a 9 x 9 pan--I lined my with foil and sprayed with cooking spray--you could probably use parchment paper, as well.

Combine chocolate chips and sweetened condensed milk in a microwave safe bowl.


Microwave 2-3 minutes, stirring after every minute, or until chocolate is melted and the milk is incorporated (this picture is after 1 minute) I stirred again at 2 minutes and cooked it an additional 30 seconds just for good measure. Add vanilla and stir well. At this point, I decided on an add-in and stirred in about 1/3 cup of chopped pecans. (Next time I'd probably go with 1/2 cup).

Pour into your prepared pan and chill for about two hours.


Turn out onto a cutting board, peel back the foil if you used it, and it's ready to cut.
This made a thin, dark, rich tasting fudge. I used semi-sweet chocolate chips, but I think it would be good with milk-chocolate chips, and probably the peanut butter or butterscotch flavored chips as well. I think it would also lend itself to doing a layered fudge with two different flavors of chips.

I packed some of it in this cute little mini-lunch box tin that I bought in the seasonal decorations at Dollar Tree.
Besides the ease of this recipe, I liked the fact that the ingredients are items you can keep on hand for anytime, not just during the holidays. Chocolate chips and sweetened condensed milk may not be something you keep on hand in a really basic pantry, but I think most of us have them on hand or readily available, at least.
Why not stock up while they're on sale everywhere and surprise your family with this luscious bite of rich chocolate later in the winter, when they aren't expecting it? Maybe you can make your own goodies for Valentine's Day, too, instead of buying "store-bought" candy.
Tomorrow I'll have another easy microwave fudge, but one that makes one that's totally different in taste and texture.
Until next time, good cooking, and good eating!

Tuesday, December 21, 2010

Gifts from the Kitchen--Quick and Easy Coconut Macaroons

For my second installment in the Gifts from the Kitchen series, I chose a cookie that's unusual for me, especially in a homemade version.

Ya'll know that "quick and easy" is my middle name when it comes to recipes--this recipe is no exception, but I am so impressed with myself for making these--I had no idea that coconut macaroons were so easy to make, and oh, my, are they wonderful. These are not those horrible hard ridged squares that passed for coconut macaroons in my childhood. Chewy in the middle, crunchy around the edges, they're like taking a bite of sweet goodness that I can't even describe.

Ingredients:

  • 1 14 oz pkg sweetened flake coconut
  • 2/3 c sugar
  • 6 T flour
  • 1/4 t salt
  • 4 egg whites
  • 1 t almond extract (I used vanilla)

The recipe I used stated to mix everything together in a bowl--it works better to get all of the ingredients evenly distribued and incorporated if you mix the last five ingredients first, then add in the coconut.


Placing heaping spoonfuls on your prepared cookie sheets. The hardest part was trying the mounds all close to the same size. (This will be easier if you have a cookie scoop.)

Bake at 325 degrees for 17-20 minutes.


This is not really a batter, it has the texture of a wet pile of coconut--but it smells wonderful. And tastes pretty good, even uncooked. Warning--it's extremely sticky, even after you lick your fingers. Don't ask me how I know this.


At this point, they smell so very heavenly. Remove from the baking sheet to a rack to cool.

The first time I made these, I followed the original recipe recommendation to grease and flour the cookie sheets. Can you see how the flour on the baking sheet starts to brown? When you take the cookies off, the spatula leaves big strokes of messed up flour. So you have to wash the cookie sheet before you can re-use it, but instead of greasing and flouring it again...


...come to your senses and use parchment paper instead.


This recipe makes about 4 dozen cookies.

I think they make a good addition to any goodie bags or boxes you're making up this holiday season. They're just enough different from the usual cookies and candy that we all make to be a welcome change!

What goodies are you baking this holiday season?

This post is linked to:

Tempt My Tummy Tuesday at Blessed with Grace
Recipe Swap at Prairie Story
Until next time, good cooking, and good eating!

Sunday, December 19, 2010

Gifts From the Kitchen--Jar Mixes

The clock is ticking and the days are flying by on the calendar, but there's still time to make last minute gifts from your kitchen--made with common ingredients and with a minimum of fuss and muss.

First in my last-minute series of last-minute gifts and goodies from the kitchen, are these pretty layered mixes in a jar.

Right now everyone is getting inundated with goodies at every party and get-together--these ready-made mixes make a pretty gift, and will be appreciated one cold winter night when those New Years diet resolutions have worn off and the ready-made goodies they got at Christmas or Hanukkah are a dim memory.

All you need are the recipe ingredients and some quart jars with lids--wide mouth work better, but as you'll see, the smaller mouthed ones can work, as well. I got two of my recipes from Heart 4 Home's Gifts in a Jar, and used my own brownie recipe for the other. You can do this with just about any recipe, as long as the total volume doesn't exceed the size of your jar--in this case, a quart.


I gathered everything together this weekend for some major baking and "mixing" I had planned, and spread it all out with arm's length. Luckily I had a canning funnel to help fill the jars, but if you don't have one of these handy, you might want to make a loose funnel out of waxed paper for easy of filling with less spilling.


I started off planning to take pictures at each stage, but soon learned and handling "powdery" ingredients like flour and cocoa, and taking pictures don't really mix, so this is the only "during" picture that I ended up with.

The main thing to remember is that the ingredients need to be added with the finer textured ingredients at the bottom, the chunkier stuff at the top--if you start with chocolate chips and then pour flour over the top, for instance, the flour will sift down in between the chunks and mess your layers up.

Step number two is to try to smooth each layer and pack it as tightly as you can. I used a spice bottle for that--guess what, you can't tamp down flour or cocoa very well, the bottle sinks(!) Recipes with oatmeal pack well--add the flour, then the oatmeal, then tamp it down to your heart's content!

Next add the sugars, and last the chunky stuff.


Don't these look pretty? These are for Homemade Brownies, Cranberry Hootycreeks, and Cowboy Cookies.

I added circles of Christmas fabric cut with pinking shears, tied with ribbon and garnished with a berry spray. My last step will be printing out the recipe directions (add butter, eggs, bake at 350, etc ) on some card stock, cutting with the pinking shears, and tying to the jars with the ribbon.

Change the fabric, or leave it off and tie the recipe card on with some raffia or other decorative ribbon, pair a couple of them with a kitchen gadget or two and a pretty dishtowel, and you have a perfect gift for a kitchen shower or housewarming party.


Cranberry Hootycreeks
  • 1 c plus 2 T self-rising flour
  • 1/2 c oatmeal
  • 1/3 c packed brown sugar
  • 1/3 c sugar
  • 1/2 c dried cranberries
  • 1/2 c white chocolate chips
  • 1/2 c chopped pecans

Layer in the order listed. Recipe instructions:

  • In a medium mixing bowl beat together 1/2 c softened butter, 1 egg and t teaspoon of vanilla. Add the entire contents of the jar, and mix together until well blended. Drop by heaping spoonfuls onto greased or parchment paper lined baking sheets.
  • Bake for 8 to 10 minutes at 350 degrees or until the edges start to brown
  • Cool on baking sheet or wire rack
  • Makes 18 cookies

Easy Homemade Brownies

  • 1 c flour
  • 1/2 c cocoa
  • 2 c sugar

Layer ingredients in the order listed ( I messed this up by putting the sugar first--when I tried to tamp the cocoa, it started mixing with the sugar. Oops

Recipe:

  • Pour entire contents of jar into a mixing bowl
  • Add 1 stick (1/2 c) of butter or margarine, melted; stir slightly; then add 4 eggs and 1 t vanilla
  • Pour into greased or cooking sprayed 9 x 13 pan.
  • Bake at 350 for 25-30 minutes

Cowboy Cookies

  • 1 1/3 c self-rising flour
  • 1 1/3 c oatmeal
  • 1/2 c firmly packed brown sugar
  • 1/2 c sugar
  • 1/2 c chopped nuts
  • 1 c chocolate chips

Layer ingredients in order listed--tamp well after the oatmeal layer, and after the brown sugar layer. I made this one first, and did not "pack" everything tight enough, so the first one only held about 1/2 c of chocolate chips. I made another and figured out the best layers to tamp down and everything fit much better.

Recipe:

  • Empty entire contents of jar into a large mixing bowl, and thoroughly blend everything with your hands or a mixing spoon. Add 1 stick (1/2 c) of butter or margarine, melted; 1 slightly beaten egg, and 1 t vanilla. Mix until completely blended. This may require your hands! Shape into balls the size of walnuts, and place on greased or parchment lined cooking sheets.
  • Bake at 350 degrees for 11-13 minutes or until edges are lightly browned.
  • Cool 5 minutes on baking sheet, then remove cookies to racks to finish cooling.
  • Makes about 30 cookies

I had a lot of fun making these--now that I've gotten the hang of it, I may be doing more of these. Be sure to check out the jar mix "recipes" at Heart 4 Home, or do an internet search for "jar mixes", there are tons of different recipes and sites out there with lots of ideas, from sweet to savory.

What pre-made mixes or jar mixes have you made, or would you like to receive?

This post is linked to:

Three or More at the Gypsy's Corner

Just Something I Whipped Up at the Girl Creative

Tuesday Night Supper Club from Fudge Ripple

Until next time, good cooking, and good gifting!